05:00
Design & User Experience


But … I’m not a Web Designer?
- Wealth of packages available in the Shiny ecosystem
- Plug-in favorite theme styles
- Ability to go as low-level as desired with CSS and JavaScript
💡 It’s not all about you! (That’s good)
Language of the Web
Shiny
dept_choices <- c("Ancient Near Easter Art", "American")
selectInput(
  "dept",
  "Select Department",
  choices = dept_choices
)
HTML
<div class="form-group shiny-input-container">
  <label class="control-label" id="dept-label" for="dept">
    Select Department
  </label>
  <div>
    <select id="dept" class="form-control">
      <option value="Ancient Near Easter Art" selected>Ancient Near Easter Art</option>
      <option value="American">American</option>
    </select>
  </div>
</div>
Multiple Levels of Abstraction
Empowers users across spectrum of design experience
Cascading Style Sheets (CSS)
Set of rules that define how HTML content is presented in the browser
- selector defines which elements on page to apply rule
- property list set properties of elements to specific values
Customizing CSS in Shiny (1)
Customizing CSS in Shiny (2)
Customizing CSS in Shiny (3)
Your Turn: Exercise 1
In the application ex-1/app.R, give the image display a bit of style! Visit the exercise page for more details.
(Almost) Endless Possibilities
- Shiny UI powered by Bootstrap
- Defaults are clean and simple
- Revising the style for every element …

Enter {bslib}
Provides tools for customizing Bootstrap themes directly in R
- Easy to explore theme options interactively
- Logical parameters to most common elements for color, font, and more
- Built upon the Sass stylesheet language to extend traditional CSS with modern features
Your Turn: Exercise 2
Building upon the app from exercise 1, use {bslib} to customize font and other theme elements!
05:00
Boosting User Experience (UX)
Accessibility
Prioritizing accessibility leads to better UX!
- Keyboard navigation (without mouse)
- Visualization color palettes accounting for vision deficiencies
- Metadata for HTML tag attributes
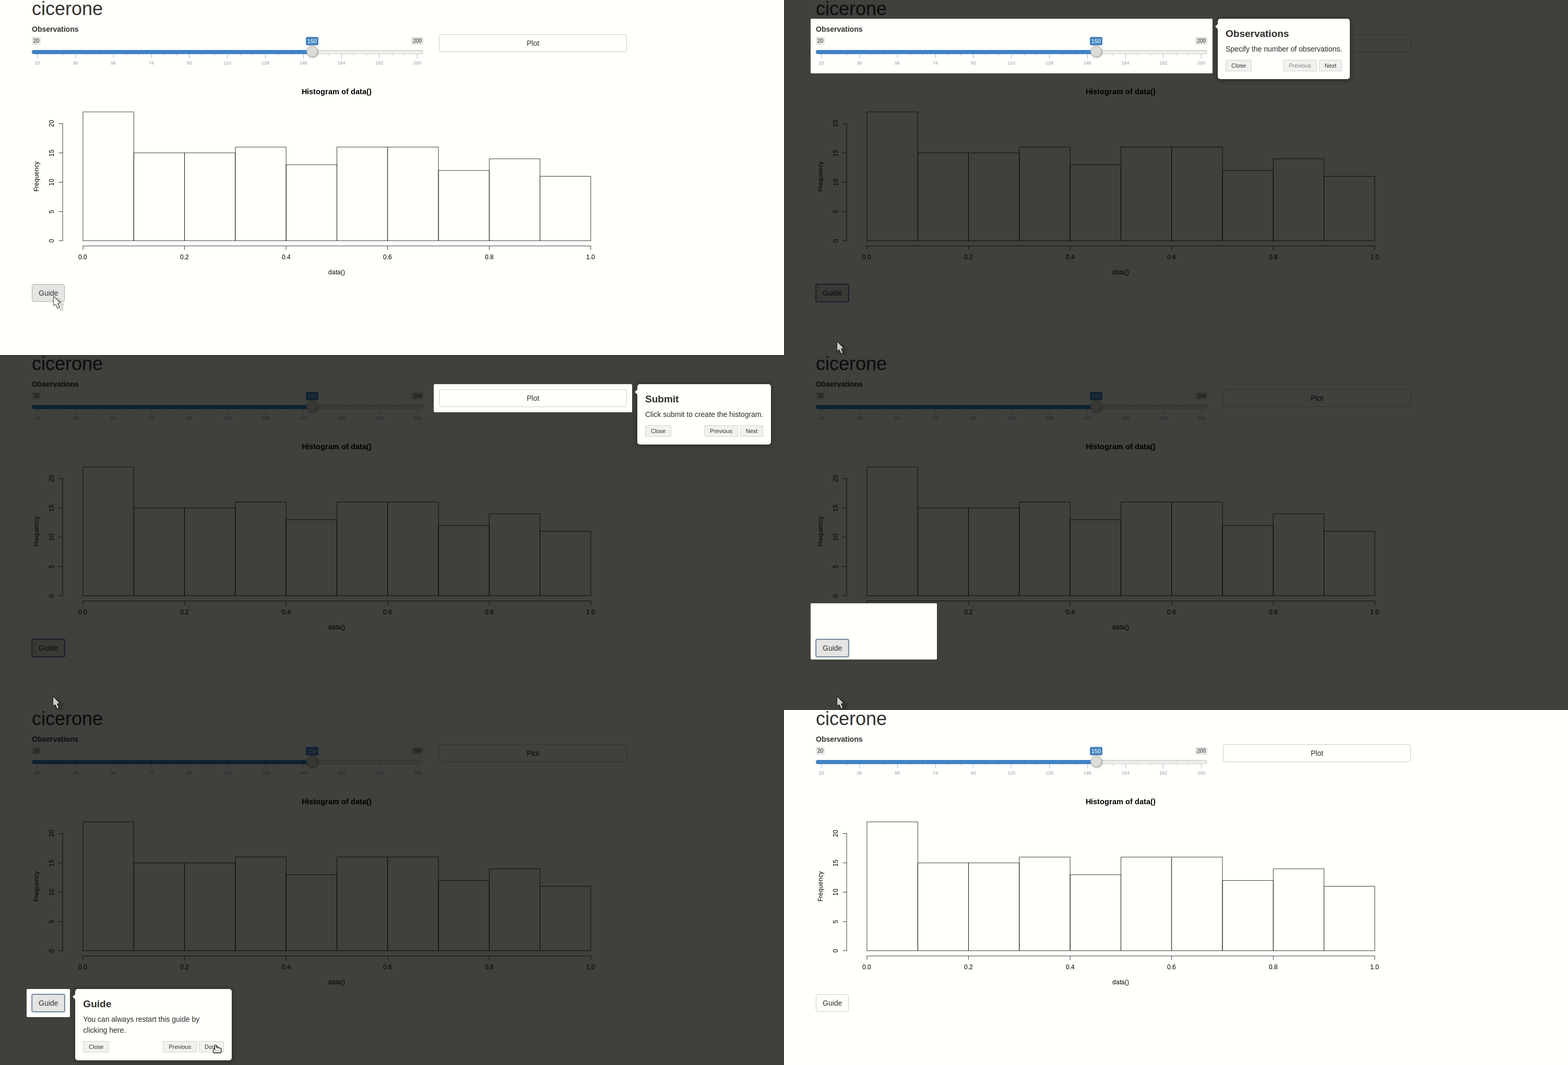
Guides with {cicerone}
A convienent API to create guided tours of Shiny applications using
driver.js

The {cicerone} Workflow
- Note the input IDs of elements for guide
- Use the
CiceroneR6 class andstep()methods to define steps - Import dependencies by declaring
use_cicerone()in app UI - Define triggers to start guide in app server
{shinyWidgets}
Custom widgets and other components to enhance your Shiny application
- Alternatives to many classic Shiny inputs wrapping specialized frameworks within Bootstrap, Material Design, and more
- Fantastic demonstration app: shinyapps.dreamrs.fr/shinyWidgets

The Shiny UI Ecosystem

Choose your Widget
😐 Not quite: {shiny} and {shinydashboard} use different styling toolkits under the hood
💪 {htmltools} to the Rescue
useValueBox <- function() {
  if (!requireNamespace(package = "shinydashboard")) {
    message("package 'shinydashboard' is required to run this function")
  }

  deps <- htmltools::findDependencies(
      shinydashboard::dashboardPage(
        header = shinydashboard::dashboardHeader(),
        sidebar = shinydashboard::dashboardSidebar(),
        body = shinydashboard::dashboardBody()
      )
  )
  htmltools::attachDependencies(tags$div(), value = deps)
}

value_box <- function(...) shinydashboard::valueBox(...)Back to {shinyWidgets}
Usage of this powerful technique in {shinyWidgets}:
Extend with JavaScript
Not Just Styling
All of Shiny’s interactivity is powered by JavaScript
- Direct pipe to & from R process to client (browser)
- Normal use: Everything set up for you
Foundations in place to extend Shiny’s power when desired
Varations underpin many community packages
{shinyjs}
Easily improve the user experience of your Shiny apps in seconds, without having to know JS
- Enable & disable buttons
- Show & hide elements
- Dynamically adding and removing CSS classes
- Click a shiny button from server side
- Run JS scripts easily if desired
Your Turn: Exercise 3
Harness the power of custom JavaScript in the Art Viewer App!
10:00
